Welcome to my 7th grade science blog!

Thursday, March 31, 2011

Density Lab


DENSITY LAB

I.  GUIDING QUESTION: How does the density of various solids affect the way the sound waves travel from a tuning fork?

II. HYPOTHESIS
                         Hypothesis (Adrian): I think that increased density of the medium might cause the sound waves to travel faster, but be quieter.
                         Hypothesis (Jude): The density will cause the pitch to increase although the loudness will not change.
                             
III. EXPLORATION
                         A. Materials:
  • Wood
  • Plastic
  • Ream of Paper
  • Rock
  • Sponge
  • Cement/Concrete
  • Tuning Fork (341.3F)


                         B. Procedure:
  1. Find desired materials. Measure or research to find their density.
  2. Set up a table in your notebook with three headings: Material, Density and Loudness/Pitch/Observation.
  3. Tap the side of the tuning fork against each material. Remember to always stay the same distance away from the tuning fork and to keep your tests in a room with the same temperature.
  4. Write down your observations in the Loudness/Pitch/Observation category.

IV.  RECORD & ANALYZE
                                          A.  Data Tables:
                       
Material
Density
Loudness/Pitch/
Observation
Wood
680 kg/m(3)
High at first but softens to a medium pitch. Very empty loudness.
Polycarbonate Plastic
1360 kg/m(3)
A low, soft pitch. Loud.
Ream of Paper
94 kg/m(3)
Very loud, low pitch.
Volcanic Pumice
641 kg/m(3)
A medium pitch with a soft, rumbling after-effect. Not very loud.
Sponge
100 kg/m(3)
Extremely soft, almost no volume. Normal pitch.
Cement
1100 kg/metres(3)
Starts low, but rises to a medium volume. Low pitch.


C.  Analysis of Data (Adrian): I found that most of the time, the denser the material was, the lower pitch it had. However, density had no significant effect on the loudness. I wasn’t here while my lab partner Jude was doing these test, so it is difficult to make as many observations.
                
Analysis of Data (Jude): The lower pitch in some of the materials comes from the sound waves traveling through dense material. The rumbling from the Volcanic Pumice is from the rock itself. The crumbly, rough top would produce a rumbling. The ream of paper is unique because it is thick, therefore has the properties of dense material. The less dense materials produced a medium to high pitched sound. The sponge produced almost no sound because it was so soft and had an extremely low density.
                                         
IV. CONCLUSION
                            Conclusion (Adrian): My hypothesis was “I think that increased density of the medium might cause the sound waves to travel faster, but be quieter.” I found out that denser mediums caused a lower pitch, but didn’t have an effect on the volume of the sound. My hypothesis was completely wrong. I learned that different properties of the medium can effect the sound in different way, so sound won’t necessarily travel the same way in two materials with the same density.
                          
                            Conclusion (Jude): My hypothesis: “The density will cause the pitch to increase although the loudness will not change,” was proved sort of correct. It really varies from material to material. From the data table we can see that the denser the material the lower and louder the sound. This is because the particles are more compact therefore when they vibrate together they produce a greater sound.

V. FURTHER INQUIRY
                                     Further Inquiry (Adrian): I realized that there was a fatal flaw in out experiment that made all of data mostly invalid. We were supposed to be testing how density of various mediums effected how sound travels. So the density of the medium was supposed to be the variable, and all other factors such as the elasticity of the medium were supposed to remain constant. However, in our experiment we changed the density and elasticity whenever we changed mediums, so we couldn't be sure if the patterns we noticed in our data were because of the change in density or the change in elasticity. To avoid this next time, we would need to find materials with exactly the same elasticity, but different densities. Although that would be difficult to find, it would be necessary for our experiment to be truly scientific.

                                     Further Inquiry (Jude): For a start, I could have definitely had Adrian and myself test, but he was away, so I had to rely on my own data. I would have maybe liked to have added a few more materials to the test just to make the testing more interesting. Well after the tests were conducted, Adrian found a flaw that, not ruined our tests, but did change the ideology. We were meant to only manipulate the density, but we ended up in the course of choosing different materials changing elasticity and partially changing the temperature. To avoid this next time we should find different materials with the same elasticity but different density (that would be hard).I would have definitely liked to have changed the frequency of the tuning fork and maybe change the order of testing the items, just to make things simpler. Otherwise I feel that the testing in a nutshell went very well. Another test we could have conducted is measuring the speed of the sound waves and changing the frequency of the tuning fork.

Wednesday, March 16, 2011

Summaries About Sections I Took Notes On


Section Summaries
Section 1:
In this section we learned various things about sound and how it works. Similar to what we learned in the Bill Nye video, “Sound is a disturbance that travels through a medium as a longitudinal wave”. I found it interesting that all sounds need vibration, and vibration needs a medium, so in empty space where there is no air, sound just doesn’t exist. I knew that sound couldn’t exist before, but I never knew why. I also learned about various properties of the medium that sound can travel through that affect the way sound travels, like the elasticity, density and temperature of the medium. The section ended with a brief history and explanation of supersonic travel.
Section 2:
In the previous section one of the things I learned about was the properties of the medium sound travels through. In this section, I learned about properties of sound itself. Those properties include intensity, loudness, frequency, pitch and resonance. The section continued with an explanation of the Doppler effect, and ended with a brief explanation about how the sound barrier for supersonic planes work.

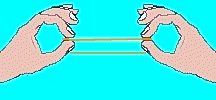
Rubber Band Sounds


This is the second lab that I'm posting.

Rubber Band Sounds

I.  GUIDING QUESTION: How are the sounds that vibrating rubber brands produce effected by their width, their stretch, their length and how far out they are stretched?


II. HYPOTHESIS:
I think that the more the thinner, more stretched, shorter, or more stretched out to the side a rubber band is, the higher it will sound.


III.  Exploration (PLAN & DO A TEST):

Materials:
  • Thin Rubber Band
  • Thick Rubber Band


Procedure:
  1. Stretch out a rubber band.
  2. Pull and let go off the rubber band, leaving it to vibrate
  3. Repeat steps 1 and 2 using different amounts of stretching, stretching to to the side, or change the length or width of the rubber band.


IV.  RECORD & ANALYZE:
Amount of Side-StretchObservations
1 centimeterlow, almost no sound
2 centimeters sound is higher and longer than with 1cm
3 centimeterssound is higher and longer than with 2cm
4 centimeterssound is higher and longer than with 3cm
5 centimeterssound is higher and longer than with 4cm

Amount of Length-StretchObservations
Lowa very low, unclear sound
Higha rather high pitch, slightly unclear sound

Thickness of Rubber BandObervations
Thicka very low, very unclear sound
Thina relatively low, unclear sound

Length of Rubber BandObservations
Shorta rather high pitch, clear sound
Mediuma lower pitch and more unclear than the “Short” one
Longthe lowest pitch and unclearest sound of the three


V.  Concept Acquisition (CONCLUSION):  
Our Guiding Question was “How are the sounds that vibrating rubber brands produce effected by their width, their stretch, their length and how far out they are stretched?”. To this I answered, “I think that the more the thinner, more stretched, shorter, or more stretched out to the side a rubber band is, the higher it will sound.” I believe that my hypothesis was right as our results clearly show answers that match my expectations. This is probably because when the waves travel through a looser or shorter rubber bands, their frequency and therefore even their “pitch” lowers. For the side stretching part, I believe that we acquired our answers thanks to the larger stretch increasing the amplitude of the waves and therefore making the sound more audible.


VI.  Concept Application (FURTHER INQUIRY):
The stretching of the rubber bands was done by hand so we cannot rely on its accuracy. If we used something more accurate than human labour, we could get more accurate results. I still believe that the general results would remain the same. Also, we could do tests with material other than rubber bands to see if the results would remain the same or if they would change with the change of material. Overall I think that this was a “simple” lab and the general idea seems to be more important than exact results. For exact results, the tests would have to have been conducted differently.

How People Produce Sound


While we had a substitute, we did two labs. My parter was Jan. I finished these labs a while ago in Google Docs, but I haven't posted them until now.

How People Produce Sound


I.  Guiding Objective:
Objective 1: Observe how your vocal cords affect the sounds you make.
Objective 2: Observe how you lips, tongue, and teeth influence the sounds you make.

II.HYPOTHESIS:  I think that tighter and longer vocal cords will make higher sounds. I also this that the lips, tongue and teeth are vital tools that your body uses to produce different sounds.

III.  Exploration (PLAN & DO A TEST):
         (Materials) List the instruments and materials you will use
       Procedure - Requires partner
  1. Pronounce the Words in the list below to your partner. Pay attention to how you pronounce the first letter in each word.
  2. Together decide if you are stopping your breath when you are pronouncing the first letter of each word. Use a check mark to record in the Data section if the consonant is stopped or open.

Word List:
boat
fan
kite
pen
sister
dog
vote
gate
zebra
tone


IV.  RECORD & ANALYZE
         Data Tables:
                      
First Letter
Stopped
Open
b
✓
f
✓
k
✓
p
✓
s
✓
d
✓
v
✓
g
✓
z
✓
t
✓

       
          Analysis of Data: I determined whether our vocal cords were open when I pronounced specific letters by feeling with a hand whether considerable air flowed out of the mouth when the letter was pronounced. My partner and I both pronounced the letters, and almost always agreed whether our vocal cords were open or closed. I don’t really see any patterns in this data, because all of these letters are consonants yet some require open vocal cords, and some require closed.


IV.  Concept Acquisition (CONCLUSION):  
1. Is the shape of your mouth or the position of your teeth or tongue different when you pronounce a “d” than when you pronounce a “t”? No, my tongue and teeth positions are the same when pronouncing those letters.
2. What is the difference between the sound of a “d” and the sound of a “v”? When making a “d” sound, my tongue touches the roof of my mouth. When I make a “v” sound, my lower lip touches my upper set of teeth.
3. For which first letter sound(s) in the table do you use you lips and your voice, but not your tongue or teeth? I don’t use my tongue or teeth when making “b”,  and “p” sounds.
4. What part of the larynx is like the strings of a guitar?  The vocal cords are like the strings of a guitar.

My guiding objectives were:
“Objective 1: Observe how your vocal cords affect the sounds you make.
Objective 2: Observe how you lips, tongue, and teeth influence the sounds you make.”
In my tests I learned that the tighter the vocal cords are, the higher pitched sound the make. I also learned that my body uses my lips, tongue and teeth to manipulate my mouth in various ways so that it can produce a wide variety of sounds. This is quite similar to what I said in my hypothesis, so I was correct.

V.  Concept Application (FURTHER INQUIRY):   
I think that my data is quite valid, mostly because the tests I conducted were simple and there wasn’t really a large potential for error. I don’t think that I need any improvement in this category. If I were to do this again, I would test a wider variety of letters so I would have a better chance to look for patterns.
Why are women’s voices usually of a higher pitch than men’s? I think that women have higher-pitched voices than men because their vocal cords are more stretched.
Why, then, are the voices of young girls and boys about the same pitch?
Their voices are about equal because before puberty, their vocal cords are stretched about the same amount.

Tuesday, March 1, 2011

Earthquake Safety

     As a new science assignment about earthquakes, I am supposed to write about how I would prepare my apartment for an earthquake.


Before the earthquake, I would make a survival kit containing this list of items that I got from this website.

  • Flashlights with extra batteries
  • Battery-powered radio with extra batteries
  • One-week supply of water
  • One-week supply of non-perishable food and a manual can opener
  • Alternative cooking source
  • A first aid kit and handbook
  • A-B-C multipurpose fire extinguisher
  • Extra medication for those who need prescription drugs
  • Adjustable pipe or crescent wrench to turn off the gas and water supply
  • Chlorine bleach and instructions for purifying water
  • Candles and matches
  • Blankets, warm clothes, sturdy shoes and heavy glove
Preparation: 
I  would have a professional come and inspect all the appliances in our home, to make sure they are earthquake ready. If I have a gas stove, I should know where the shutoff switch is, but I have an electric stove, so I don't need to do that. However, everyone should know where the electric switchoff is. Also, we have a lot of unsecured bookshelves with lots of books and other heavy things on them, so I would secure them with brackets, like this:


While the Earthquake Happens:
Stay indoors if you already are. Get under a sturdy table or desk, or go in a doorway.

 You shouldn't hide near walls that connect outdoors. Also avoid mirrors, picture frames, glass and furniture that might tip over. IF you are outdoors, stay away from power lines and buildings. For example, a parking lot would be ideal. In my house, I would probably go to the archway in my living room, because it is away from glass and furniture that might tip over.

Evaluating my House for Earthquake Safety
My house isn't so earthquake safe, because there is a lot of glass. We have glass doors, lots and lots of windows, and not that many tables or desks. However it doesn't have a gas stove, and we have lots of doorways, so that's a plus.